Transcribing a live keyboard performance.
HyperScribe makes it easy to record directly from your MIDI keyboard. Finale automatically interprets note durations by comparing your performance with the metronome click. While it requires an accurate performance, when HyperScribe is configured correctly it can represent the fastest way to enter notes.
By the end of this lesson, you will know how to:
To begin at this point, open tutorial document Tutorial 2.MUSX. How?
When you click the HyperScribe tool and select a measure, Finale provides a metronome click. As you play along to the click, Finale notates what you play.
Before you begin, however, it’s a good idea to make a few adjustments. Live performances are never perfect, so Finale rounds-off your performance to the closest note based on how long each key is held down. Therefore:
You can play something like this…

and Finale will notate something like this.

To get better results, you can either adjust how long you hold down the keys or adjust the parameters (called Quantization Settings) that Finale is using to interpret your performance. For this exercise, let’s change our settings to ensure a more accurate performance.
To adjust the quantization settings:
The Quantization Settings dialog box includes a number of other settings that you may find useful. Finale allows you to change your Quantization Settings in between recording sessions, so if you have a section with faster notes coming up, you can quickly adjust the settings and record a different passage. See Quantization for more detailed information on how to make the most of these options.
Next, let's set the tempo of the click track we will be using. By default, Finale uses the playback tempo shown in the Playback Controls as the recording tempo, so let's change that now.
To modify the recording tempo:

As long as Use Playback Tempo is selected in the Playback and/or Click dialog box (the default setting), Finale will use the Playback Control's tempo setting as the recording tempo.
Now we’re ready to record some music.
To record a performance with HyperScribe:

Tip: The weak attack of the sound used for the Vocal staff isn't ideal for recording, especially if you are playing through your computer speakers only. To use a sound with a more assertive attack, change the playback sound of the staff to Piano for recording purposes in the ScoreManager.
Note: If results from your HyperScribe recording are off consistently, for example, one eighth note late throughout, you may be experiencing MIDI latency, which is a short signal delay between your keyboard and computer. To resolve this, choose MIDI/Audio > Device Setup > MIDI Setup
One of Finale’s great time-savers is the ability to record more than one line at once with HyperScribe. This allows you to record the left and right hand of a piano part at the same time.
To record into two staves:

Note: In these examples, we are recording the notes from each staff that require only a single independent voice, or layer. We will be filling-in the other voices later, in the "Multiple Voices - Layers" section.
In addition to adjusting the quantization settings to improve the accuracy of a recording session, Finale allows you to adjust the tempo independent from the playback tempo. So, if you are transcribing a busy passage, you may want to record at a slower tempo (and not have to change the tempo in the Playback Controls every time you want to switch from playing back to recording).
To set the recording tempo independently from the Playback Controls:
Notice that this window also gives you control over other aspects of your HyperScribe recording session. By default, Finale will play music from the other staves as you record. However, you can turn this feature off by unchecking Play Staves While Recording.
You can also specify the main beat duration. You may want to change this setting as well. This can be very helpful for recording passages in 6/8 where you may want the main beat to be a dotted quarter note or an eighth note depending on the tempo.
You can also adjust the number of measures that Finale gives you as a countoff.
To change the number of countoff measures:
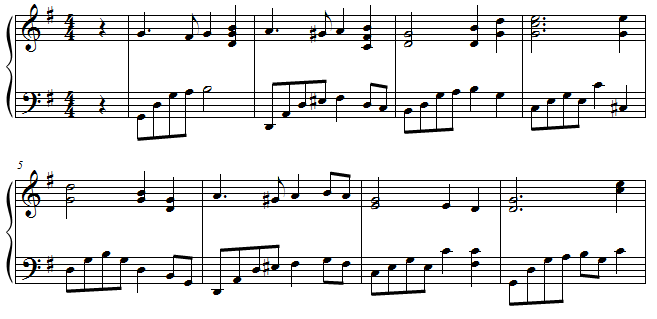
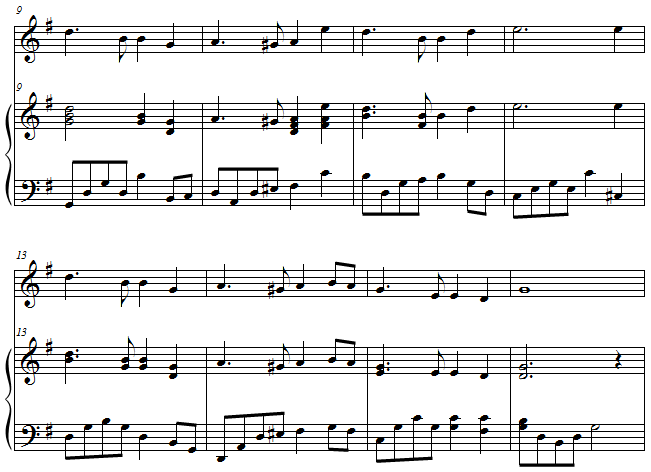
Now that you know how to adjust these settings, try transcribing the following passage (mm. 9-16 in the voice and piano). Use either Record into One Staff or Split into Two Staves.
 Previous Previous
|
Next 
|
|
Finale User Manual Home
|

|