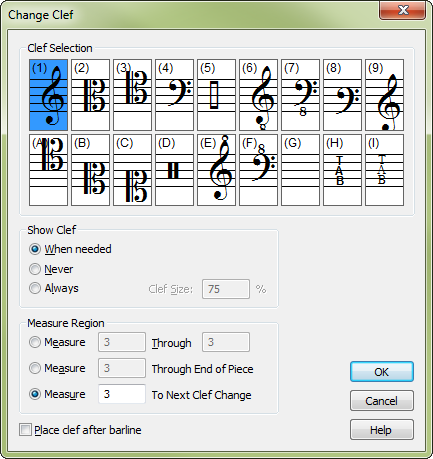
Change Clef dialog box

How to get there
You can access the Clef Chang dialog box in three ways:
- Click the Clef tool
 , then double-click any measure to enter a clef change
at the beginning of the measure.
- To enter a mid-measure clef, highlight
a region beginning where you would like to enter the clef change, then
double-click the highlighted region (or press Enter). See Selecting
music.
- In Simple Entry, select a note, press ALT+SHIFT+C, and then Select.
What it does
In this dialog box you specify which clef
you want to use and tell Finale whether you want it to occur at the beginning
of the measure or somewhere in the middle.
- Show
Clef: When Needed • Never • Always. Select When Needed to display
a courtesy clef if the clef is changing from the previous measure. Select
Never to hide the clef. Select Always to force the clef to display.
Tip: Use Never at
the end of a first ending repeat to set the clef for the second ending
without displaying it.
- Clef
Size __%. This box is available only when you have selected Always
Show Clef. Enter in the size of the new clef as a percent of full size.
- Measure
___ Through ___ • Measure ___ Through End of Piece • Measure ___ To Next
Clef Change. Using these text boxes, tell Finale what range of
measures you want to be affected by the clef change. Finale shows the
measure you clicked in the text boxes; if you’re only changing a single
measure, you don’t need to adjust these settings.
If you want to change the measure you clicked
through the end of the piece, select the middle option. If you want to
change the measure you clicked until the next measure of a different clef,
click the lower option.
- OK
• Cancel. If you click the OK button, Finale places the clef you
selected at the beginning of the specified measure and returns you to
the score. Click Cancel to return to the score without adding or editing
a clef.
See also:
Clefs
Clef tool
Clef Designer dialog box


